I have the directions (without my pictures) in a Word document and will be happy to share them - just email me
Flip Flop Album
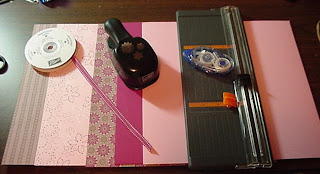
Supplies:
4 sheets 12 x 12" plain cardstock
6 sheets 12 x 12" coordinating designer paper
Paper cutter with scoring blade
Adhesive
Embellishments
I used:
Textured card stock in Pretty in Pink and Purely Pomegranate
Berry Bliss Designer Paper Pack
Boho Blossoms Punch
Flower Fusion (felt flower pack)


Cardstock:
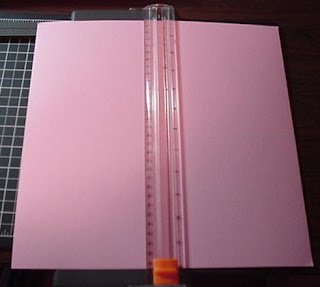
Cut 3 sheets of cardstock in half 6 x 12". Set one 6 x 12" piece aside to use for cover.


Score and Fold each of the 5 remaining 6 x 12" sheets 3" from each outside edge as shown in diagram below


Adhere these five pieces together by putting adhesive on the 3" areas as in diagram below


Designer Prints:
Sections 1, 3, and 5 will have "doors" that close like the diagram below

Cut five pieces of designer prints 5 3/4 x 5 3/4". Lay out these 5 sheets on the 6" cardstock squares; this will help you design the rest of the album. Adhere.


Cut 6 pieces of designer paper 5 3/4 x 2 3/4" for the "doors" and adhere these keeping the pattern matching.

Cut 6 additioanl designer pieces 5 3/4" x 2 3/4" for the insides of the doors. Adhere in place.

Next cut 4 pieces of designer prints 5 3/4 x 5 3/4" for the remaining 6" squares (when you fold up the album). Adhere.

Cover:
Score remaining piece of cardstock 3" from each end and again at the 2 1/2" mark. This will allow for the thickness of the book. See diagram below


Ribbon:
Open the cover and using a craft knife, make a slit in the middle of the 3" scored line wider than your ribbon as shown below:


Adhere ribbon to inside of the cover and thread through the slits to the front

To finish, adhere the book into the cover, putting adhesive only on the square of the center back.

Cut 4 pieces of designer print 5 3/4" x 2 1/4" to embellish the front cover and the insides of the cover

Embellishments:
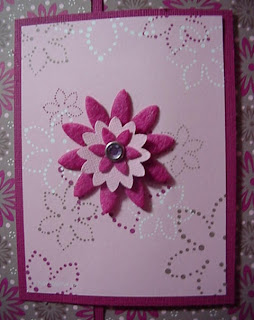
Front Cover: Cut cardstock 4 x 3". Cut designer paper 3 3/4 x 2 3/4". Layer, Close cover. Center on cover, applying adhesive to the left side only. Embellish.


This is what the front of your album will look like when done.

Decorate inside doors same as the front


You will end up with 9 windows to place your pictures. When it's laid out flat, there will be three sections with "doors" and two sections with pictures showing. You start folding from the right and then fold in the left. Then right and left again!
Finished Album

Disclaimer: I'm VERY tired tonight, so if things aren't clear please email mail and I'll make corrections!! Thanks for your patience!!
Original directions by Ellen Smallwood
Redesigned by Jan Farring 1/2008


5 comments:
Jan...this is absolutely beautiful!! Thank you so much for doing this tutorial!! I will be back later when I have more time to look more closely!! I need to make some of these!! Thanks again!
Sheryl
Thanks so much for this tutorial. Sometimes it is so much easier to see step-by-step pictures of how things go together! Great job and thanks so much for sharing with us! ~chris
What wonderful work. Thank you so much for sharing and the teaching how. I am also interested in how to make the Plant Pot. I found it in the Archives. You said you used it as a Treat Holder. You are truly blessed with your art. Thank you once again for this site.
Linda
This is Beautiful work! Thank you for sharing all of it. Totally found your site by accident. This is a great accident. lol I am also interested in directions on making the Plant Pot. You said you used it as a treat holder. Thank you once again for such a wonderful site. Your Blessed.
WOW! Very beautiful book! I love it. I'm going to email for the directions. Thanks for sharing it.
(Dawn)
Post a Comment